 Josh Moller-Mara
Recently I’ve been playing around with interactive visualizations, using tools like d3.js and GGobi. One of the things I like about interactive visualizations, as opposed to static graphics, is that with interactive visualizations you don’t have to make all the information available at once. You can present a broad overview of your data. And by having the user query specific data points, you can present more data as needed. Take this example of airport flight connectivity in the United States. If you had to display all the airport names and all the connections in one graph, it’d probably look pretty gross and would be very confusing to disentangle.
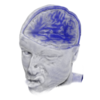
Similary, with MRI data, it’s usually hard to see the big picture at once. MRI data is usually just displayed in 2D slices. If you’re showing activations you may show a couple slices, perhaps one axial and one sagittal, so your audience can get an idea of where your clusters take place. If you wanted to show a whole brain, you could perhaps do an animated GIF, like so.
But this is fairly annoying, as it doesn’t allow you to stop the animation or zoom closer to points of interest.
XTK, however, allows you to display MRI volumes interactively in-browser using the magic of WebGL. XTK takes in a number of formats, from volume .nii files to Freesurfer surface meshes. Their website has a lot of examples, and writing code for it seems fairly straightforward. One particularly cool example, though, is XTK’s live reslicing demo, which allows you to see slices of the brain at any angle, in real time, instead of just axial, sagittal, and coronal slices.
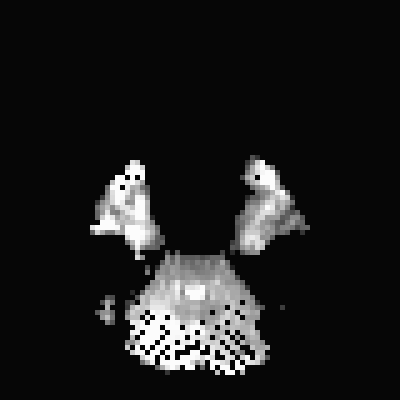
Here’s a cool example of rendering the isosurface of the same brain above using XTK. Using the mouse you can rotate, pan, and zoom in. I still need to tweak the parameters a little more to get a clearer image of the brain, and I think what I’ll eventually do is convert the brain into a FreeSurfer surface and have XTK render that. But this is a fun first attempt (initially written four months ago).
A fun idea too, if you have a presentation involving MRI volumes, would be trying to throw this in a reveal.js presentation.
Here’s some of the code to extract a volume for XTK and generate a GIF image using AFNI.
# Select a sub-brick from AFNI_data6
# I use an EPI, because the anatomical would be huge without resizing/resampling
3dAFNItoNIFTI -prefix example FT_epi_r2+orig'[5]'

# Get rid of the skull, you may also be able to use 3dAutomask
3dSkullStrip -input example.nii -prefix examplestrip.nii

## Trying to normalize intensity
# MAX=$(3dBrickStat -max examplestrip.nii)
# 3dcalc -a examplestrip.nii -prefix examplestripscale.nii -datum short -expr "a/$MAX*1000"
## For some reason this won't actually save it using a short data type
## (You can verify this with 3dinfo)
## XTK for me seems to have problems with volumes using floats

# Have AFNI create an animated gif. It uses gifsicle by default
# Turn crosshairs off so they don't show up in the GIF
afni -com 'OPEN_WINDOW A.axialimage'         \
     -com 'SET_XHAIRS OFF'               \
     -com 'SAVE_AGIF A.axialimage example-axial '\
     -com 'QUIT'                 \
     examplestrip.nii

# Resize and change the speed of the gif image
gifsicle -O2 -d 8 --scale 5 example-axial.gif > example-axial2.gif